
For any company projects or GitLab repository, we need to make sure all the processes to contribute should be standardized. So, maintaining a proper pull request standard is important. It will save time and energy for you and your team members. It also helps new team members to show the standard and easily onboard them to the team.
The best part of creating a Pull Request (Merge Request) template in GitLab is we can update it anytime and configure it in just 5 steps.
Steps to create a PR template in Gitlab
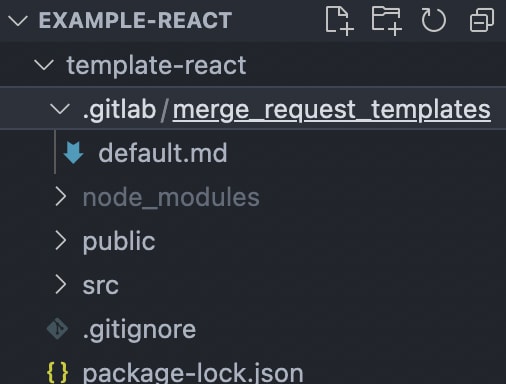
1. Create a folder .gitlab/merge_request_templates in your project root
Navigate to your project root and create a folder name as .gitlab. Then we also need to add another folder inside the .gitlab as merge_request_templates.
 NOTE: We need to create a
 .md file and the name of the file should be the same name of the template you want it to appear in your GitLab repository, which we will see visually in the step yet to come.
We can see that I have created a file name called default.md because I want to have a template name as default.
2. Update default.md
Now, let’s update the content inside the default.md as below.
  ## Trello Card Link:

  - Link of a Trello card (we use [Trello]
    (https://trello.com) for Project Management)  which was assigned for completing the feature.


 ## Tasks Done: (list of tasks completed)

  - What did you complete in this PR? Mention a list of them (we will see it in an example in upcoming steps below on how it is done in a real project)

 ## Tasks Remaining: (List of tasks remaining to be
    implemented)

 - What is remaining to be implemented in this PR? Mention a
   list of them

 ## Steps to test feature:
 - How can we test the feature we implemented in this PR? You
  could mention steps to test it.

 ## Screenshots:

  (if your changes have any UI updates, include screenshots of
  the changes)
I want my fellow developers to add the Trello card link assigned to them, add what they have completed and remaining, how we can test it, and screenshots if possible.
This is the template format we use in Truemark Technology. It helps those who are reviewing the PR, know what feature they should review, link to feature description if they have any confusion, and what feature is implemented in this PR.
3. Commit and push
Let’s commit the code and push the change to our default branch, which in our case is develop.
 > git add .
 > git commit -m "create new template"
 create new template
  1 file changed, 0 insertions(+), 0 deletions(-)
  create mode 100644 .gitlab/merge_request_templates/default.md
> git push origin develop
  Enumerating objects: 6, done.
  Counting objects: 100% (6/6), done.
  Delta compression using up to 8 threads
  Compressing objects: 100% (3/3), done.
  Writing objects: 100% (5/5), 384 bytes | 384.00 KiB/s, done.
  Total 5 (delta 1), reused 0 (delta 0), pack-reused 0
  remote:
  remote: To create a merge request for develop, visit:
  remote: https://gitlab.com/sushilsubedi151/template-
          react/-/merge_requests/new?
          merge_request%5Bsource_branch%5D=develop
remote:
To gitlab.com:sushilsubedi151/template-react.git
4. Create a new branch to verify the new template
Let’s follow the below steps to verify the new template:
- Checkout to a branch called
check-templatewith
git checkout -b check-template
- Create a dummy file called
test.txtand add some content to it with
echo "This is a test content for checking my new PR template in Gitlab" >> test.txt
- Add new changes with
git add .and commit those changes with
git commit -m "Added test.txt to test PR template in Gitlab"
- Push your changes with
git push origin check-template
5. Create a merge request
In this step we will breakdown the process into two smaller steps:
- Choose a template: Let’s create a merge request and set the target branch to
developbranch.
Note: Make sure we have set the default branch as develop.
To set the default branch from master to develop, we need to follow below steps:
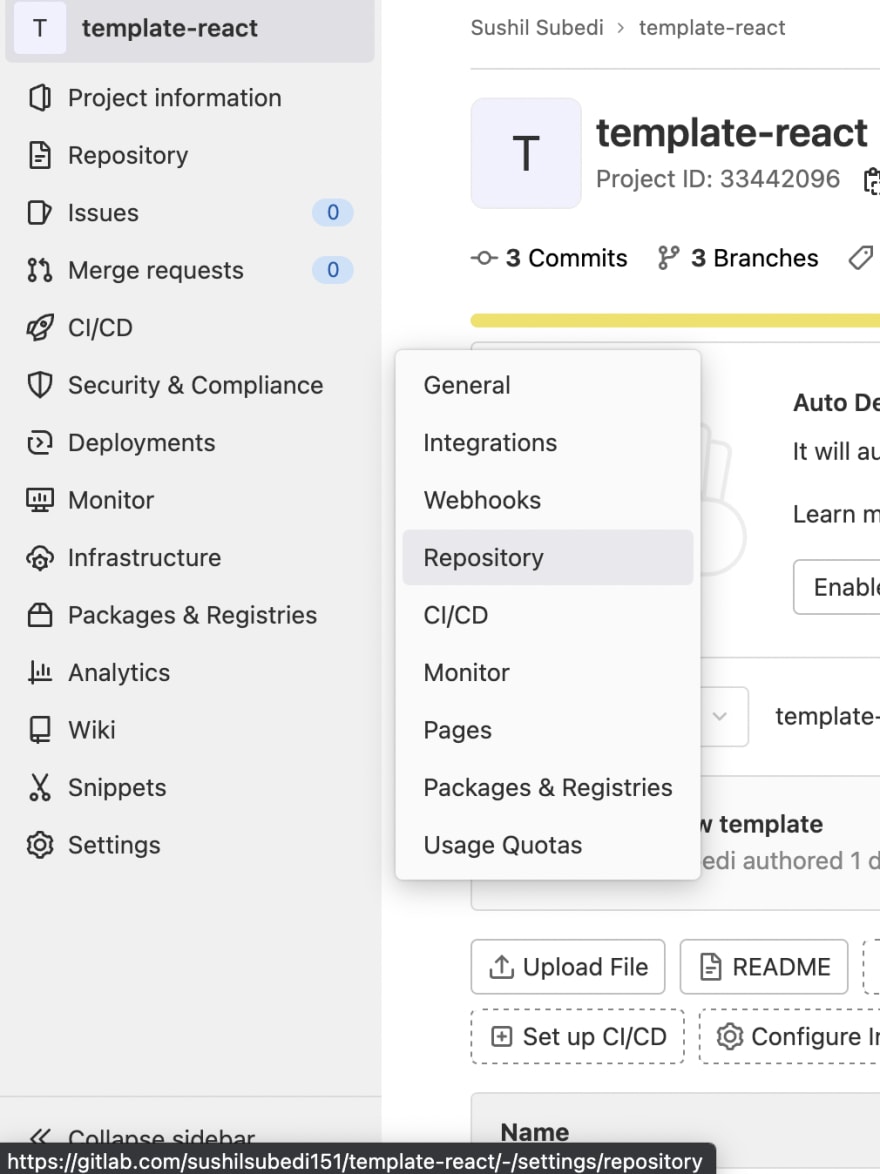
- Let’s select Repository from Settings as shown above.

- Now, Let’s select develop from the list of branches and click on Save Changes.
We need to create a merge request by selecting Merge Requests and clicking on New Merge Request. After that, we need to select from the template list.
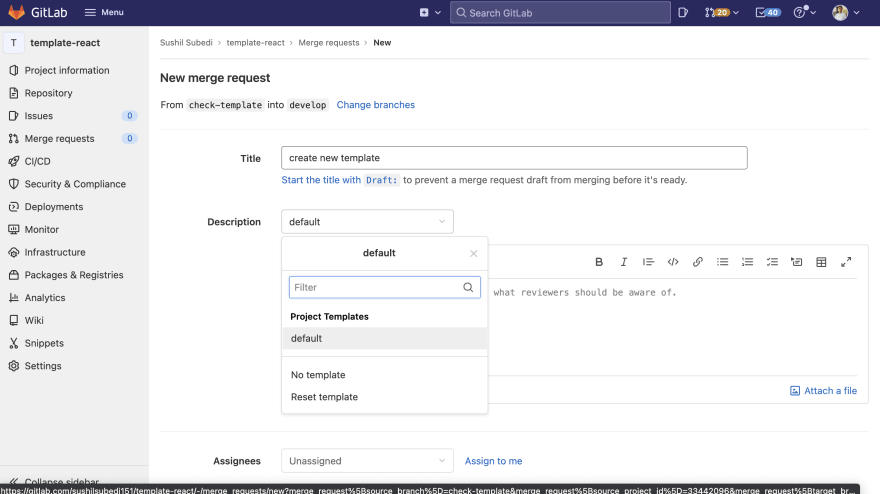
As we can see, default as our template name.
- Edit the template: In this step, we will be updating the selected template.
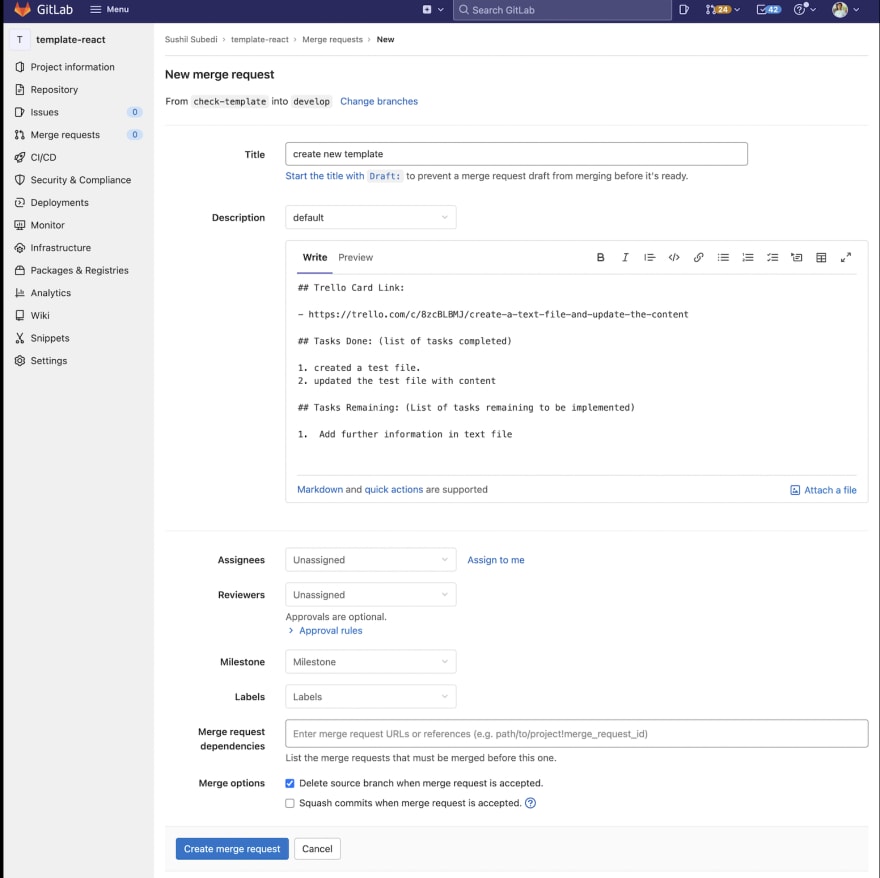
In my case, I have just updated the content of the test, so I have to remove the Steps to test feature, Screenshots, updated Task completed, and remaining task. After this click is over, Create Merge Request.
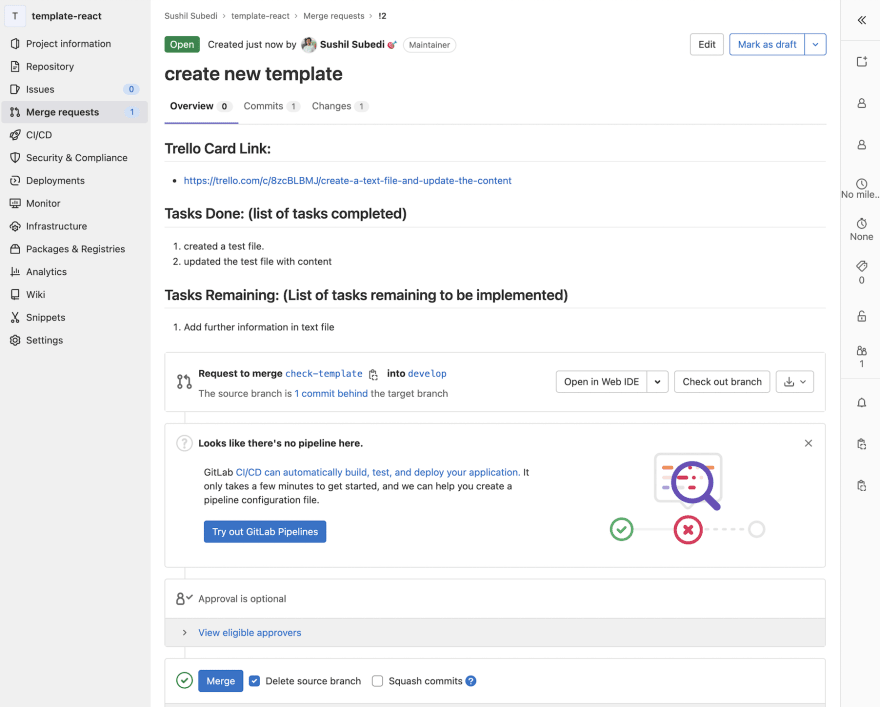
This way, we have successfully created a merge request using our template.
Conclusion
This is how we create GitLab pull request template. I hope this article helps you build and set a standard format for your team. Thank you so much for reading my blog. I really appreciate it. Please do share it with your friends. Plus, any suggestions are appreciated.
Please feel free to check out our related article Integrate Pronto with GitLab CI for Rails App